
Mastering Screen Sharing on Windows 11 via Zoom
Mastering Screen Sharing on Windows 11 via Zoom
The need for technology for remote conferencing has never been greater as more individuals across numerous industries begin working from home. While physical offices are closed, services like Zoom for win10, which provide online meetings and video conversations, are more important than ever for keeping organizations operating effectively. Although the Zoom win 7 platform is pretty simple to use, depending on whether you use the desktop or mobile version, its core features are set up significantly differently for Zoom win 10. Find the details in the upc0oming sections to learn about Zoom for win10.
The increasing demand of Zoom in Windows 7 has resultantly enforced users to use Zoom win 10 on their new window versions. Fortunately, installing Zoom on your PC is a quick and easy procedure that will have you using the service in no time. One of the most popular video conferencing systems is now Zoom. You may have noticed that you didn’t have to register to attend if you’ve ever attended a Zoom win 7 meeting. Zoom requires that you create a free account and as soon as Zoom for win10 has been installed on your computer, you may start using it right away. Here are the details.
Part 1. How to Download Zoom Desktop Client
A popular trend, particularly in the last two years, is working from home. Although the Basic plan that is free has a 40-minute time restriction on group meetings, Zoom is accessible for download for free. However, you are permitted to hold an infinite number of one-on-one meetings and group meetings with up to 100 participants. If you want more, you may upgrade to the Pro plan, which raises the 24-hour meeting time limit and adds admin controls and features like a personalized meeting ID and user management.
Steps to Download Zoom Desktop Client:
As we are all aware, Zoom allows us to host meetings, attend lectures, and see webinars. As opposed to conventional offices and schools, Zoom also makes it feasible and simpler to capture a screen during a conference. It is important to understand how to download it because of this.
Step1Launch the web browser on your computer and go to Zoom.us to access the Zoom website. In the website’s footer, at the bottom of the page, click Download tab and the options are visible as follows:

Step2Now, on the “Zoom Client for Meetings” tab of the Download Center, click “Download.” Afterwards, allow the app to make changes to your PC by pressing Run as shown below:
 Forex Robotron Gold Package
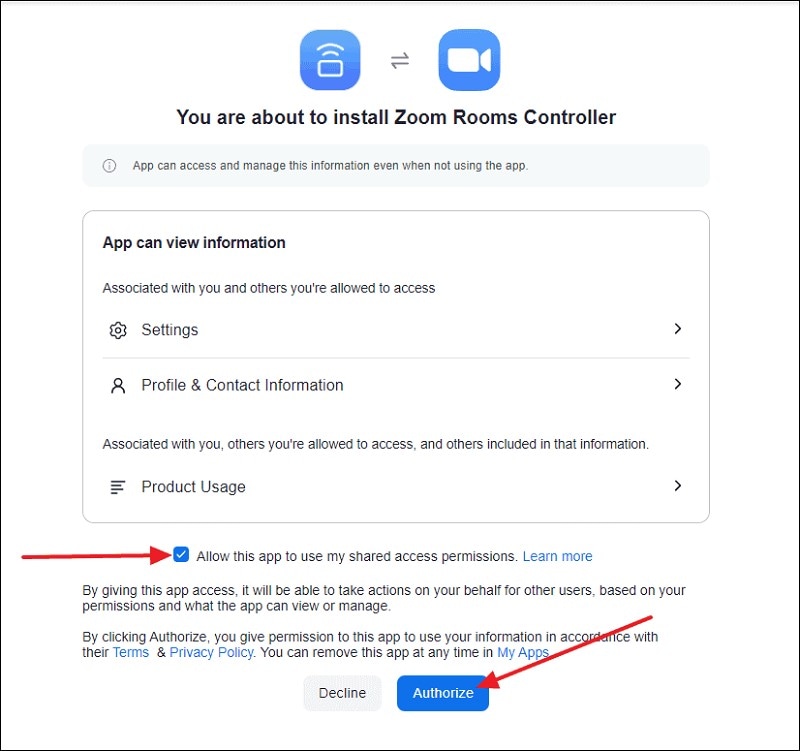
Step3After that, the Zoom software will start downloading. After that, you should click the.exe file to begin the installation procedure.
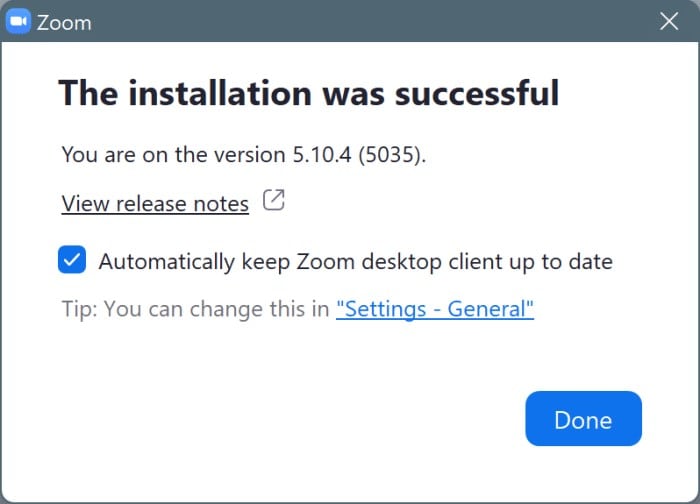
Step4Once the software is installed, you must enter into your Zoom account. If you don’t already have one, you may create one by visiting the Zoom website. After creating it, you may use Zoom as usual for all of your requirements for online meetings and video conversations.
Part 2. How to Use Zoom on Windows PC
One of the most well-liked options for video conferencing is Zoom. Cross-platform compatibility is one of the factors contributing to its success. Instead of installing a program on their PCs, Zoom also allows users to attend a meeting through a Web browser. Therefore, all you need to do in this situation is view the meeting URL provided; your browser will then display a page with a Join from your browser link. You will then be presented with a page where all you need to do to join the meeting is type in your name. You may follow these instructions to attend a Zoom meeting if you have a Zoom account. You have more choices after you log in.
How to Use Zoom on a Computer
In light of this, you may be asking how to begin using Zoom. So, in this article, we’ll show you exactly how to utilize the Zoom app on your PC. We are offering instructions for both Windows and Mac devices to make things simpler for you. Before beginning our instruction, you may alternatively download the most recent Zoom client for your desktop straight from the official website.
Step1Register for Zoom
You will need to create a Zoom Account if you don’t already have one. You have the option of making an account with only your email and password. You may register with a Google or Facebook account as well.
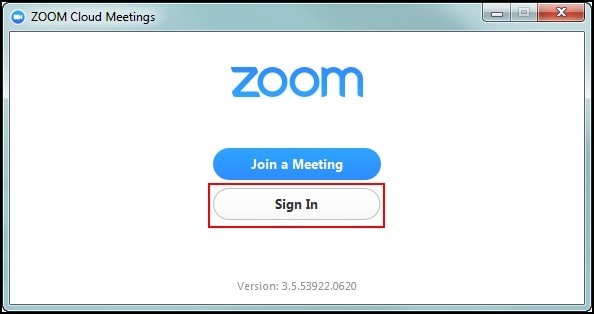
Step2Sign in to Zoom Meetings
You may sign in to begin a meeting after you have established a Zoom account. If you can’t remember your password, you may also click the forget the password button. The email address you used to sign up for Zoom will get information on how to reset your password.
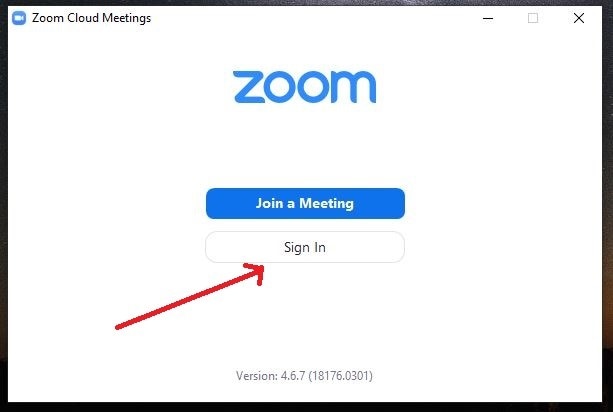
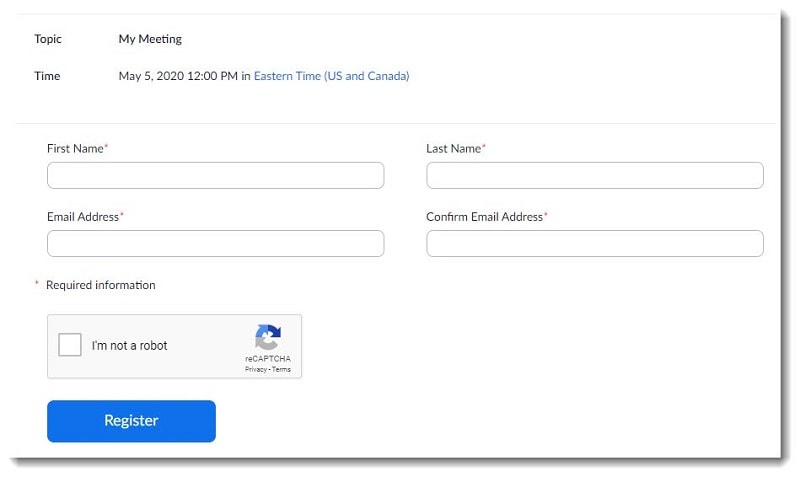
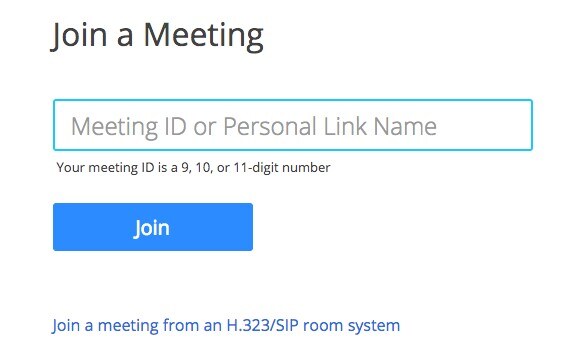
Step3Attend a Meeting via Zoom
Launch the Zoom Client, log in, and click the “Join” button to join a meeting that is already in progress. By selecting the checkboxes, you may choose your connection choices and enter your meeting ID or personal link name. Your microphone and camera are both set to ON by default. To finish the joining procedure, click the “Join” button.
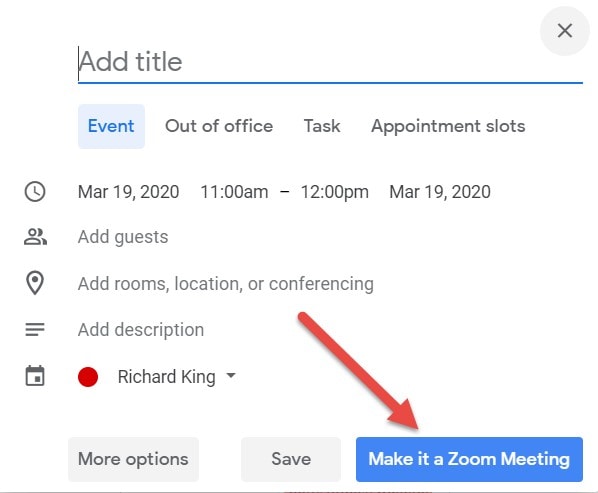
Step4Launch a Zoom meeting of your Own
Click “New Meeting” to launch the Zoom meeting window and begin a meeting. The meeting controls will become visible when you move your mouse over the bottom of the video screen. To send out invitations for your meeting, choose manage attendees. The meeting password and your meeting URL will be shown in a new window for you to copy and paste for new attendees. Before you click the “New Meeting” button, you may choose to disable the password.

 OtsAV Radio Webcaster
Part 3. How to Record Zoom Meeting Sessions with an Easy Recorder
The most practical method for simply reviewing all the specifics of internet conferences is to record them. As a result, more and more individuals start looking for information on how to record a Zoom meeting, particularly when they are not the host or have not received permission from the host. Almost all online conferences, including Zoom meetings, may be recorded using Filmora . It offers various advantages for recording online meetings, including the ability to choose the recording location. Additionally, it offers a schedule recording capability that enables automatic recording at a set time.
A capable Zoom meeting recorder is required for that. For Windows and Mac users, there is a compact yet flexible Zoom video recorder available under the name of Filmora . With only a few clicks, it enables any Zoom user, free or paying, host or not, to record a Zoom conference. Even without authorization, this screen recording tool may record camera, audio, and the screen. What you need is this meeting recorder. It’s even versatile to choose the output format for recording videos, such as MP4, AVI, MKV, etc. The hotkeys may also be modified.
Free Download For Win 7 or later(64-bit)
Free Download For macOS 10.14 or later
Step1Download and open Filmora
to take use of the simplest and most efficient way to handle this potent toolbox. You must download this on your computer using the link below.
It’s now time to install this program, so start the downloaded file from your computer and follow the simple instructions to complete the installation.
Step2Create a new recording project
When you click the New Project button in the launcher window, the software’s first window interface will appear. Click the record button on that interface, then choose the Record PC Screen option as seen below:

Step3Customize Recording
You will be sent to the next window, which includes all the settings and customization options, as soon as you click the Record PC Screen button.
When you click the Settings button on the right side of the recording screen window, the recording screen menu’s enlarged choices will appear. You have a ton of choices here for your webcam recordings, all of which are simple to comprehend, as seen in the list below:

Step4Start Recording Zoom Meeting
Within the Zoom meeting, you’ll begin the recording by adhering to the straightforward generalization. You have finished configuring your screen’s recording modifications. Pressing the red dotted button causes the recordings to begin shortly after, as seen below:


The Bottom Line
Zoom may be used on Windows devices to start new meetings, join existing ones, schedule meetings, and share the screen of your device. There ought to be a pop-up window telling you to upgrade your Zoom Desktop Client software when you click to launch it. You may follow the instructions to update your software. Everything you need to know about setting up a Zoom for Win 10 meeting is provided in the above guide. However, you can utilize the best recorder as mentioned in the guide above as Filmora to spruce up the Zoom win10 meetings afterwards. We really hope you found this tutorial to be useful and that you will immediately begin using Zoom.
Free Download For Win 7 or later(64-bit)
Free Download For macOS 10.14 or later
Free Download For macOS 10.14 or later
Step1Download and open Filmora
to take use of the simplest and most efficient way to handle this potent toolbox. You must download this on your computer using the link below.
It’s now time to install this program, so start the downloaded file from your computer and follow the simple instructions to complete the installation.
Step2Create a new recording project
When you click the New Project button in the launcher window, the software’s first window interface will appear. Click the record button on that interface, then choose the Record PC Screen option as seen below:

Step3Customize Recording
You will be sent to the next window, which includes all the settings and customization options, as soon as you click the Record PC Screen button.
When you click the Settings button on the right side of the recording screen window, the recording screen menu’s enlarged choices will appear. You have a ton of choices here for your webcam recordings, all of which are simple to comprehend, as seen in the list below:
Step4Start Recording Zoom Meeting
Within the Zoom meeting, you’ll begin the recording by adhering to the straightforward generalization. You have finished configuring your screen’s recording modifications. Pressing the red dotted button causes the recordings to begin shortly after, as seen below:
 Power Tools add-on for Google Sheets, 12-month subscription
The Bottom Line
Zoom may be used on Windows devices to start new meetings, join existing ones, schedule meetings, and share the screen of your device. There ought to be a pop-up window telling you to upgrade your Zoom Desktop Client software when you click to launch it. You may follow the instructions to update your software. Everything you need to know about setting up a Zoom for Win 10 meeting is provided in the above guide. However, you can utilize the best recorder as mentioned in the guide above as Filmora to spruce up the Zoom win10 meetings afterwards. We really hope you found this tutorial to be useful and that you will immediately begin using Zoom.
Free Download For Win 7 or later(64-bit)
Free Download For macOS 10.14 or later
- Title: Mastering Screen Sharing on Windows 11 via Zoom
- Author: Paul
- Created at : 2024-07-27 03:05:57
- Updated at : 2024-07-28 03:05:57
- Link: https://extra-information.techidaily.com/mastering-screen-sharing-on-windows-11-via-zoom/
- License: This work is licensed under CC BY-NC-SA 4.0.